Set Up New Printer
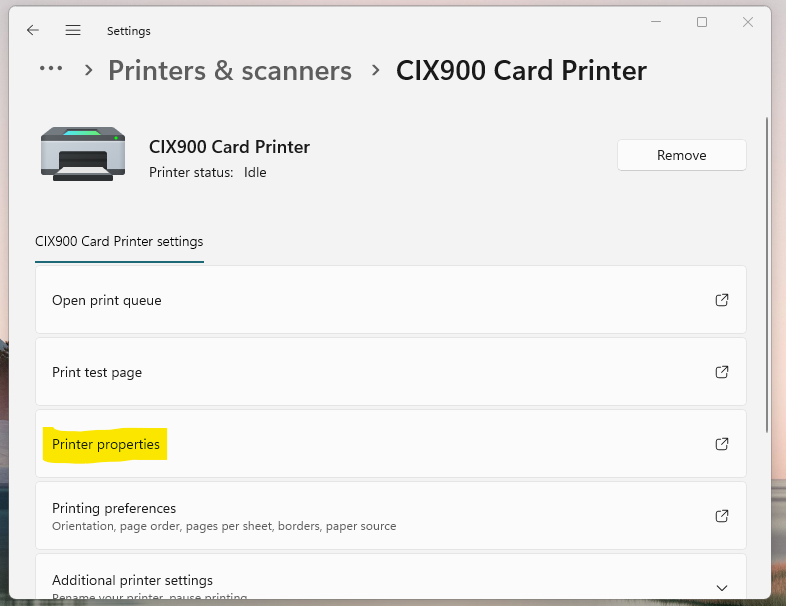
1. Navigate to Settings -> Printers and Scanners -> Select Your Printer -> Click Printer Properties

2. Click Preferences

3. Click Advanced -> Scroll and find Resin Black (K) Processing

4. Select Resin Extraction -> Select Black Dots

5. Click OK
6. Navigate back to Printer Preferences
7. Click Printing

8. Set to Standard (Full Card) under Printing on Mode

9. Click Apply
Was this article helpful?
That’s Great!
Thank you for your feedback
Sorry! We couldn't be helpful
Thank you for your feedback
Feedback sent
We appreciate your effort and will try to fix the article